3D printed gimbal

3D printed gimbal

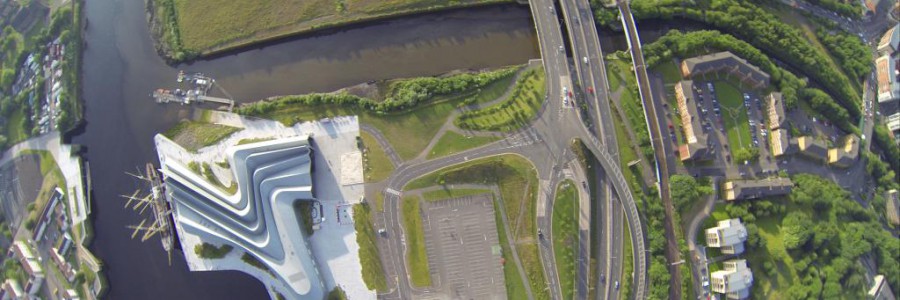
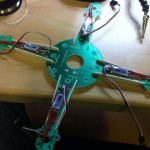
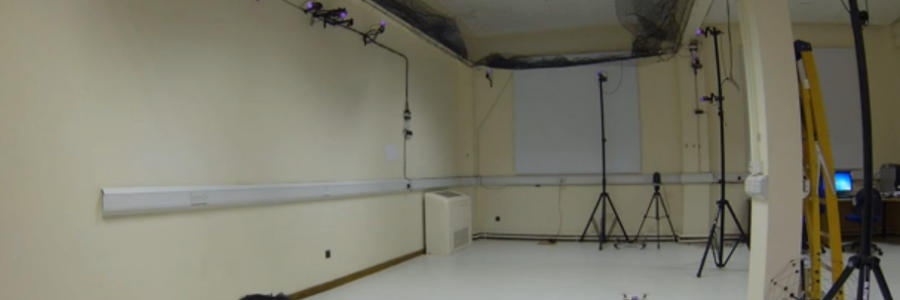
For my project I need to design and build a two axis mechanical gimbal… A gimbal is a pivoted support that allows the rotation of a object on a axis, in this case, the object it will be a laser and a camera, and it will allow them to move in two axis, with the purpose of tracking and pointing a multicopter on flight. The gimbal will be part of the ground station.

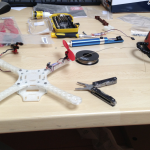
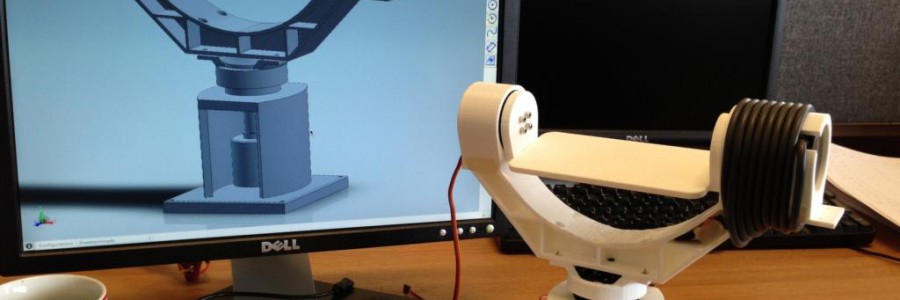
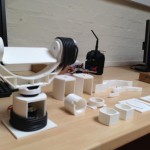
Fortunately I received help from a very special person (TEGO), nothing more and nothing less than an excellent industrial designer, hehehe, so, after dealing with all the STL files, corrections and adjustments, we proceed to the printing stage.

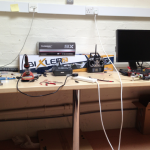
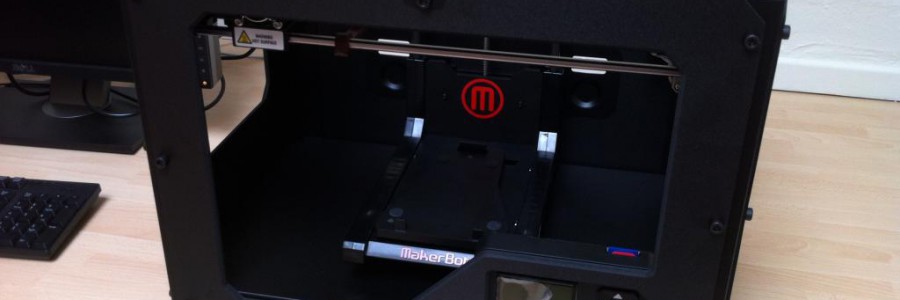
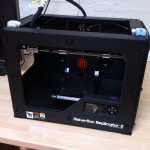
I must say that this stage was really really difficult, the Replicator 2 wasn’t cooperative enough, lots of material and man-hours were lost. After a very nice conversation with the excellent technical support of Makerbot, they send me (free of charge) a extruder upgrade for my Replicator 2. After waiting 1 week to arrive (meanwhile I was being attack by swans on Loch Ness BTW) I proceed to “upgrade” my replicator and voila!!!! it worked perfectly!!! I was able to print again all the gimbal parts with close to little effort.

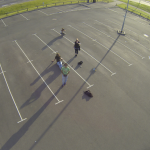
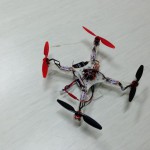
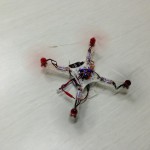
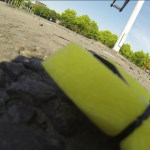
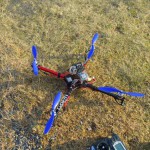
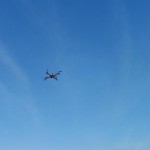
And then proceed to test the controller and the hardware, in the video you will see the gimbal being stabilised by a IMU and some open-source software, and I’m happy to say that, is working. So, the next step is to start flying things above the gimbal and see if its capable of keep pointing and tracking.

Aldux out.

Altitude test

Altitude test

Pues bueno… lets do a altitude test, I wanted cool pictures of my surroundings and of course test the limits of AlduxQuad, so, I did a couple of flights just with the idea of flight high 🙂

I was using the “position hold” mode, this mode automatically attempts to maintain the current location (based on GPS), heading (magnetometer) with manual throttle control. Wind gusts, PID’s setup and sensors will affect the effectiveness of maintaining position.

This mode relies on the GPS which must be ON and indicating that is locked before takeoff. The heading can be altered with the yaw control stick.

On the first flight I was able to raise it up to 117 meters, I did this on the parking lot of the Scottish Exhibition and Conference Centre (SECC) because that place is always deserted on weekdays.

On the second flight I got to… better watch the video 😉 But on this video I change location due to the parking lot of the SECC was very close to a Heliport, and one helicopter pilot told I couldn’t fly there. The location I choose was the parking lot of the Riverside Transport museum and Tall Ship. I got a very strange behaviour, that I’m still trying to figure it out why it happen, at the highest point, the motors stopped, and AlduxQuad started falling… see the video for the exciting footage.

Glasgow Science Festival

Glasgow Science Festival

Some colleagues and I, participated on this years Glasgow Science Festival, I took AlduxQuad and TEGO, to show them to lots and lots of kids, it was a fun festival. Some of the organisers ask me if I could fly my quadrotor above a child for taking a picture, of course I say yes, so, we went to a more safe area (no people around) and try the stunt, I was a little scared of course, is not like the dream of all pilots to hover 4 rotors with deadly and sharp props spinning at 10000rpm… but is some of the things that you have to do in our life, so, I already check that one 😉

GSF twitter

No one was hurt, the photo was awesome (I presumed…) and everyone was happy, also the child!!!! I put the FPV gear to my child so he could see the action, and because it looks cool… and I was behind the photographer trying to hover.

kid

For science you monster!!!

Ahhh and I also got my 15 minutes of fame on the GSF twitter account 😉

Note: Is “Aldux” not “Aldos” hahahaha

3D printed Quadrotor (TEGO v2)

3D printed Quadrotor (TEGO v2)

Do you remember TEGO??? It was involved in a small accident during the Glasgow Science Festival… and one of the arms was not able to continue fighting 🙁

But, for my fortune, I have to my disposition a awesome Makebot Replicator 2, and appart of making combs and lots of useless things, the main objetive of this printer is to do this kind of stuff… so, at this instance I want to test the feasibility of using a 3D printer to make things fly, so I started printing.

The main body parts were easy to peel off the platform, but the arms were a CHALLENGE… I broke 2 of them trying to peel them off. And then I had to tear appart TEGO (ESC, motors, cables, FC, everything) and put it in the new frame. I did a small video testing the frame, it vibrates a little bit, but in general is ok, now with this experience, I’ll procede to make my own frame with a especial mechanical connector I found on the internet!!! 😉 Keep posted!!!!

3D printer awesomeness

3D printer awesomeness

At the department in the University we require to build all sorts of stuff, so, I made the casual suggestion of acquiring a nice 3D printer, and… My wishes became true!!! Now the SAS group (Simulation and Autonomous Systems) has a nice Makebot Replicator 2, and that makes me super super happy!!!

It was my task to unbox, calibrate and test this impressive machine, I´m really amazed with the quality of the finished products…

So, I did this small timelapse video of the Replicator doing a screw and nut. For the interested people, the timelapse was 20 minutes on 40 seconds.

Then we print a comb… Murray started to brush little Ed. Enough said.

TEGO Micro quad

TEGO Micro quad

This is a quadrotor build intended for making quick tests and flights of FC, so far this cool and nice quad has tested 3 different FC…

Its a PCB frame, 250mm from rotor to rotor, the ESC are directly welded to it, and it contains:

  • Turnigy T1811 (2900kv) brushless motor
  • Turnigy ESC 6 amps
  • 5×3 props
  • 1500mah NanoTech LiPo

TEGO v1 2

In the flight controller department I have succesfully tested:

  • NanoWii
  • MW and Megapirate AIO
  • MicroWii ATMEGA32UA

Its really easy to crash it if your PID settings are not correctly fixed on the FC… Always remembet to use the GUI of MultiWii.

I have broken the arms in several occasions, but a little bit of cyanoacrylate does the work for it 😉

Its a nice frame, easy to build, and cheap.

First automatic flight

First automatic flight

Mmmmm, how to begin????…. Well, simply by saying that this is my first flight doing waypoint navigation…

secc

Waypoints are sets of coordinates that identify a point in physical space. Waypoints located on the surface of the Earth are usually defined in two dimensions (e.g., longitude and latitude). GPS systems are increasingly used to create and use waypoints in navigation of all kinds. A typical GPS receiver can locate a waypoint with an accuracy of three meters.

Having said that, I configured a set of waypoints to AlduxQuad and did a test. For security reasons, I did it in a parking lot that is usually with no cars, the only problem is that is close to a heliport, hehehe, I waited to the last aircraft to take off, and start to fly.

I did 3 successful tests, when Alduxquad was completing the last one, I hear a voice of a person (helicopter pilot) telling me I couldn’t fly there, in a very cool and proper manner, so I removed the auto feature and start to get it down to land it, but to be honest I was a little nervous, hehehe, so I lost the reference of the quad (nooooooobbbbbbbbb) and did a rough landing.

But apart from everything it was a successful test.

Angry dog vs Alduxquad

Angry dog vs Alduxquad

It was a beautiful day in sunny Glasgow… So, the buddies at the office decided to go to have lunch at the park, after that, Harry decided to go to the river with his beautiful bitch Kaya (let me enfatize that Kaya is not the angry dog) so, I naturally took the quad and did a wee flight over the Kelvin river… Of course several mistakes happen that day, and the worst of them is that I “pressed” the record button on the GoPro…

So, this guy in the river was taking care of several dogs, and one particular dog (the actual angry dog) noticed when I started flying and he started barking, I tough that it was going to be a problem… Eventually Harry remove his footwear and socks and went to river to make a magnificent catch of my flying quad!! (thanks for that dude!!!) saving my quad from a tasty bite and the dog of getting “bit” by propellers.

Murray was able to take this wee video of the “angry dog”, thanks for that and for sharing mate!

Unfortunately the GoPro didn’t record anything :§

Harry took one for the team and had to receive a tetanus shot because he step into something when he was on the river, ouch.

Flying a quadcopter from the computer

Flying a quadcopter from the computer

The next part of my quad-rotors project is to control them via the computer. Having that sorted, I can play with nice swarm algorithms and of course motion tracking using Optitrack cameras that are available at the SAS lab in the University.

So… I have tested two FC (flight controllers), the APM (Arducopter) and the MultiWii.

I still need to make the post for a micro quad-rotor build I did for testing the MW, hopefully later in the day.

I find that the code is a little easier to read and modify and also the hardware for MW is quite more cheaper, the NanoWii cost me like 20 bucks… So, I think that if I want to build swarms of small UAV’s the way to go is MW.

I been reading the code of the config GUI for the MW, its really quite impressive, they implemented a nice serial protocol for us to play with it, the only problem is that we have to figure out how it works by ourselves :S

But after some days I was able to perform my first flight using a joystick connected to my computer, and 3DR modems (UART), and it was not so bad… Still need a lot of work, but I can say that for right now its “flyable”, sort of.

The problem is that the GUI demands lots and lots of data coming from the MW, and of course when its plug in into a USB port, there is no problem at all, but when you try to use it with a serial modem at 115200 bps, that can be a huge problem, and that problem is lag.

So, I strip the MW protocol to the minimum, I’m only sending the RC data and receiving the ATTITUDE from the MW, and in that way, it works well 🙂

Next step… translating that code to MatLab.

Note. The first video is lagged for some reason, my GoPro was misbehaving that day 🙁

Scottish Highlands flight

Scottish Highlands flight

During February 2013 I took a wee winter break, rented a car, put some luggage and of course AlduxQuad & equipment, and started driving through the Scottish Highlands pointing towards Skye.

Near Loch Cluaine I spotted a rest stop that looked perfect for making a flight, so, I pull over, prepare AlduxQuad and start to flight. It was one of my first flights with enough confidence to take it far away from me, it was really cool and the Scottish weather really really behave!!! 🙂

In this video, the camera is on top of the quad and pointing towards the pilot, instead of front.